How To Create And Assign ‘Prospects’

Want to maximise productivity on your web chat experience? Get the right website chat tool with help from Click4Assistance’s all-in-one communication solution.
Useful conversations are central to all major lucrative businesses. Companies must have the ability to negotiate with their audience in many unique ways, wielding a spectrum of website chat tools to benefit them in completing their mission.
At Click4Assistance, we know how important it is to provide the best website chat tool with an easy to use solution that can help institutions enhance customer service operations and provide a better overall user experience for clients. But that’s nowhere near the only thing we do. Would you like to see how we can offer a helping hand in boosting your businesses potential? Have a further look at our highlighted functionality for this article… Prospects
What is the Prospects functionality?
The Prospects tool is a “contact” record allowing you to store details such as the visitor’s name, email address, company name and phone number. A prospect can then be assigned to someone in chat, or a visitor on your website. Once assigned, should they start a chat in the future or revisit your website, you will have all their details to hand.
What are the benefits of Prospects?
The prospects functionality is useful for assigning contact information to website visitors ensuring hot prospects are identified and capitalised upon.
- Visitor profiles – automatically collect visitor details via sign-up forms and purchase pages or manually add them during a chat.
- Visitor recognition – be alerted when visitors return to your site enabling targeted proactive invitations.
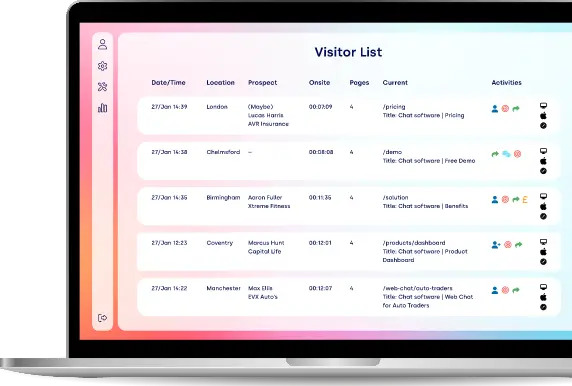
- Visitor behaviour – track visitor behaviour including navigational patterns, conversion drivers and chat activity for a deeper level of understanding.
- Categorisation – categorise prospects based on conversion information.
How does Prospects work?
As an agent you can create and assign a prospect in chat, you will need to click on the name badge icon in the toolbar in which you will then be presented with a window. You can then fill out all of the relevant visitor details, the only required field when filling out the details is the unique identifier which will either be the Email Address or a Customer ID, depending on what you choose when the prospect functionality is first enabled against the account.
Alternatively, you can search for an existing prospect if you feel one might exist. Once you’ve located and selected the relevant prospect, the details of said prospect will appear in the relevant fields and then you can assign it against them.
You can also assign a prospect to a visitor even if they don’t start a chat, by navigating towards the ‘Real-Time’ visitor activity list.
To view the full list of created prospects, simply navigate towards the ‘Tools’ module and select ‘Prospects’. In this area you can also view a list of their activities as well as manually add, remove and edit prospects. Prospect can be automatically created by adding an additional piece of script to your website; this is useful as chats will come through already with the relevant contact details.
Finally…
The prospects functionality is a useful feature for tracking visitor behaviour and being notified, should they return, along with having all of their contact details to hand. To see the prospects feature in action please take a look below or go directly to our YouTube channel for more help on how to set up live chat on website.
You can discover more information about C4A and the website chat tool with our detailed guide to the software with all of its additional features. Feel free to get in contact with our helpful team on 01268 524628 today for a free trial or demonstration.
