


How to Add Live Chat to My Website: Setting up an Account and Users


Continuing our “How to Add Live Chat to My Website” series, this article explains how to set up a trial account and configure your users, providing a full understanding of the settings available to make the account work efficiently to your company’s structure and requirements.
How to Add Live Chat to My Website - Creating an Account
Creating a Click4Assistance account starts by clicking the FREE TRIAL button. The information you enter will generate the unique account for your organisation along with the first primary user.
Details needed to create the Click4Assistance account are:
-
Email Address
-
Name and Salutation
-
Password
-
Company Name
-
Domain Name
-
Phone Number
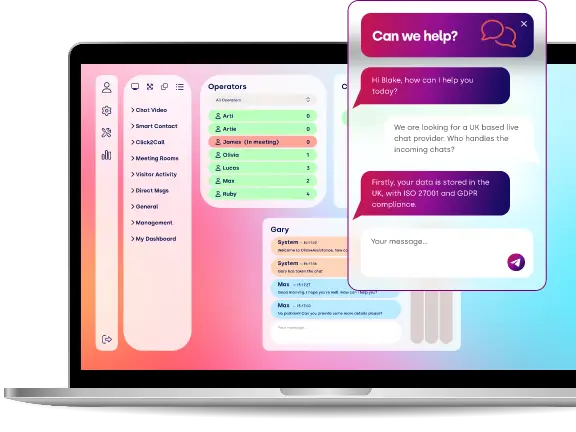
2 emails will be sent to the address provided during the creation process; one will confirm the details entered and supply information on downloading the Click4Assistance software. The second email includes the domain specific script to add to the website.
How to Add Live Chat to My Website - Creating an User
Once the Software has been downloaded it’s time to log into the account and start configuring the users that will need access to the account.
This can include:
-
Your IT team or web developer / designer who will be customising the button and windows,
-
Customer Service Representatives (CSRs) who will be handling the chats,
-
Managers and Administrators who will be overseeing the users and the account.
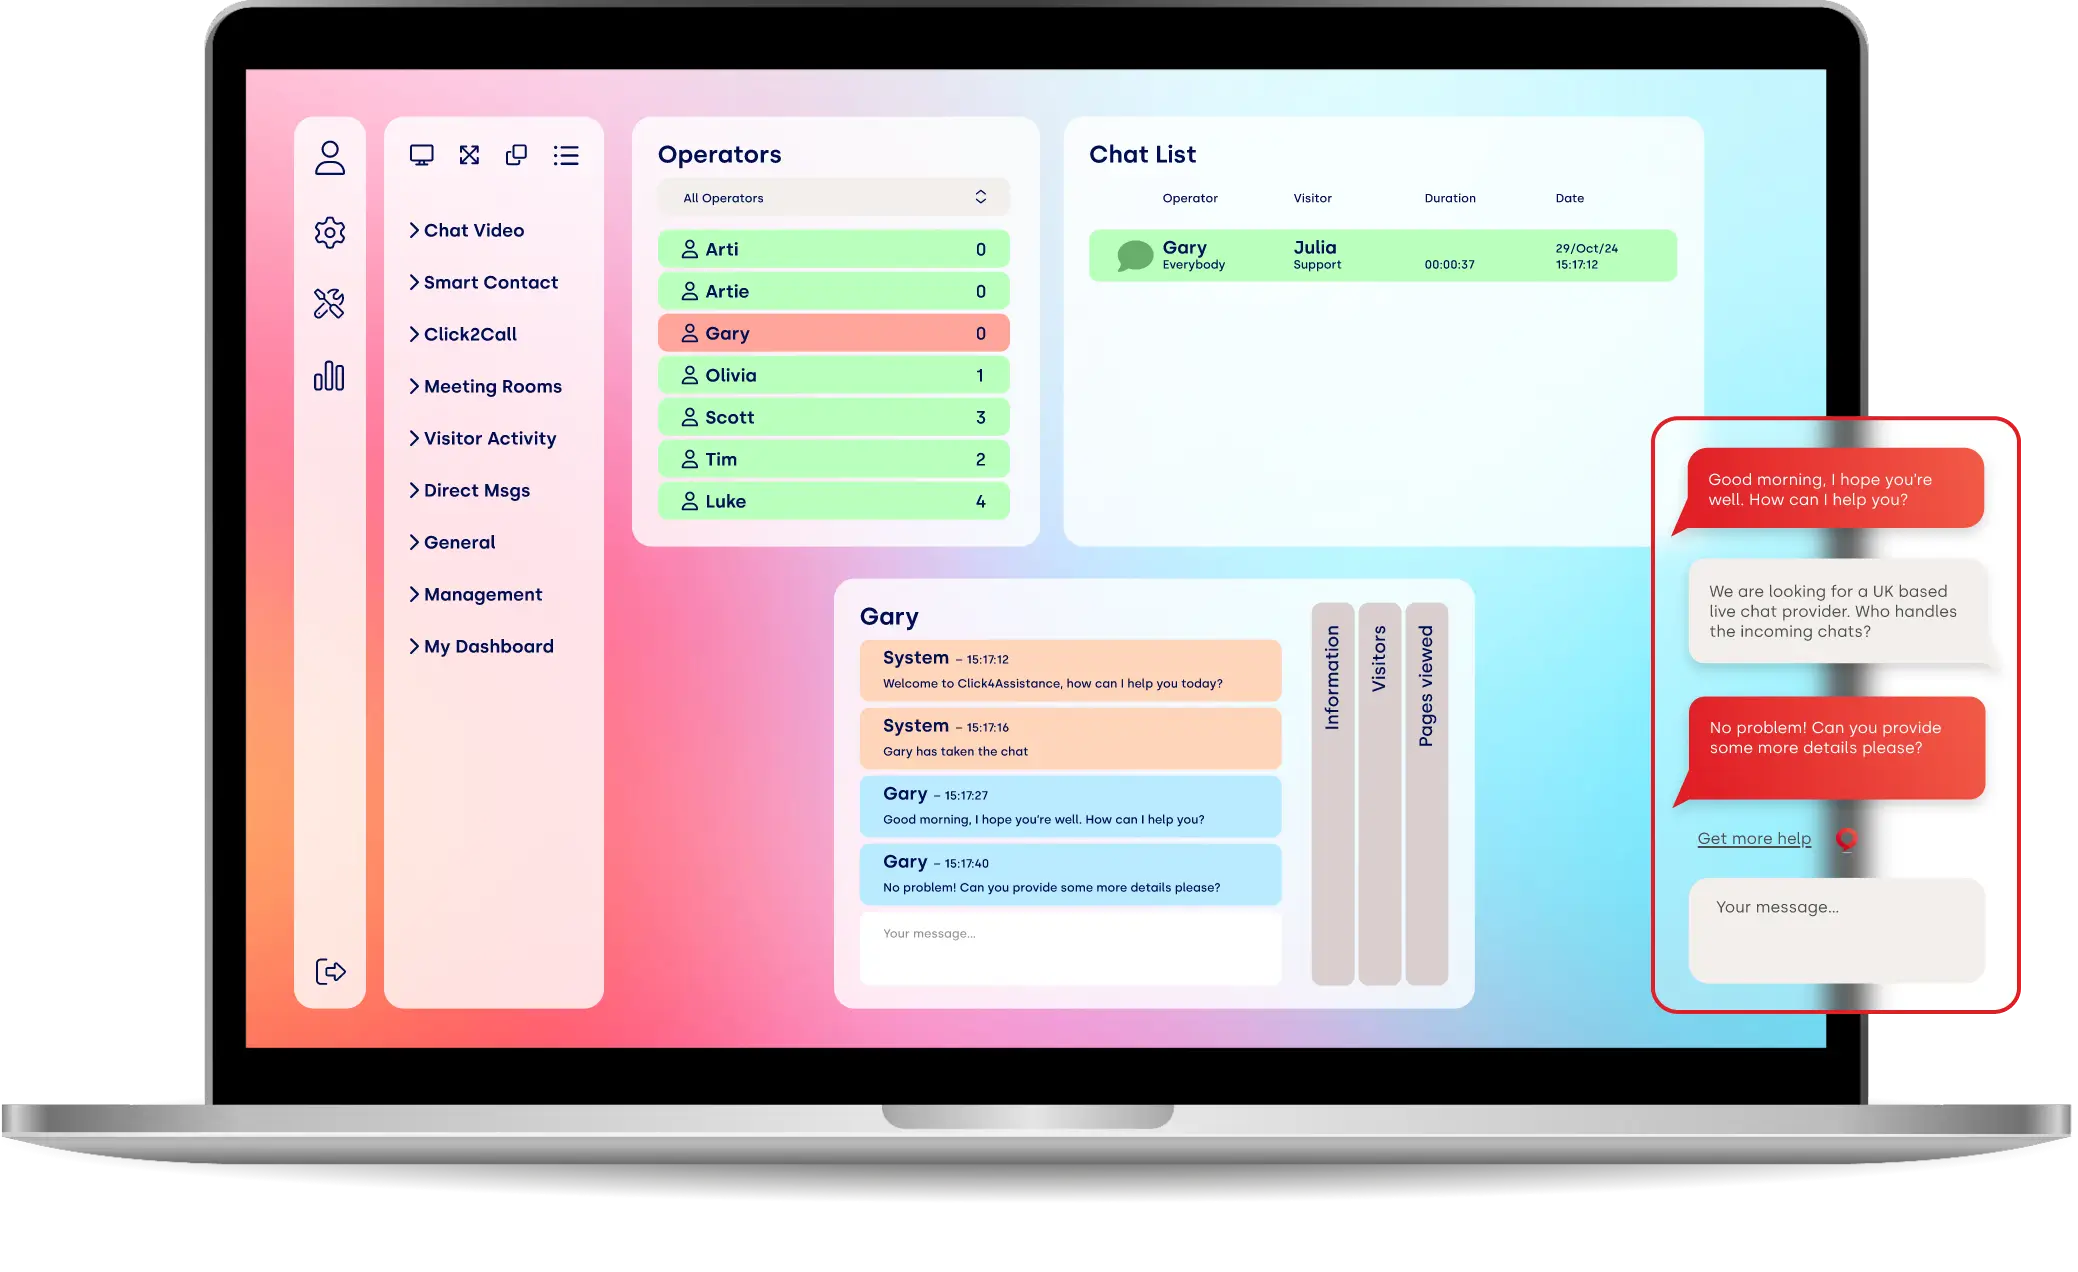
Select the first module; “Account”, within this section click on “Users”.
Add a new user by clicking “Create New” and complete the fields:
It is worth noting that if you have 2 users with the same first name the display name cannot be the same. Ways of getting around this are:
-
Sophie W
-
Sophie S
-
Customer Service Agent 1
-
Customer Service Agent 2
The user type drop down selects what level of permissions this user should have, these include:
-
Customer Service – Minimal access
-
Manager – Intermediate access
-
Administrator – Full Access
The “send this user an email with instructions to login” will email the user their login details and a link to download the software to their desktop.
How to Add Live Chat to My Website – Configuring User Settings
Once the user profile has been created, the rest of the user tabs will be available to view and configure.
Permission: The user type that was selected previously for overall permissions can now have additional permissions added, or removed including sections or the entire module from the users view
Settings: Within this section you can:
-
Set the time zone for the user’s location.
-
Select the time period for access, restricting when the user can log in.
-
Establish the time the system will automatically log the user off (good for those who are forgetful with closing down applications when leaving for the day.)
-
Restrict the IP to a specified location (for security purposes)
-
Default the user to unavailable every time they log in (good for admins/managers who are not handling chats and/or access the account out of service hours)
-
Set the maximum allocated chats limit to automatically make the user unavailable if the limit is achieved. This feature can be set to 0 to disable it and allow users to manage their own workload.
Alerts: You can choose which alerts are relevant, the alert mode (visual, audio or both) and their repetition, the sound notification with the ability to preview them.
Email Config: This section should be configured by network administrators. They will need to set up individual SMTP details against each user profile, to enable operators to send emails from within the system. This reduces time spent sending follow up emails to visitors and information to colleagues.
How to Add Live Chat to My Website – Departments and Routing Groups
Departments reflect internal organisational structure, users can be in multiple departments, for example a member of the finance department can also be in the customer service department if they deal with customers.
To set up departments go to “Account” / “User Departments”, enter the new department name and click “Add New”.
From here you can add all existing users into the departments; click department name in the list on the left, select the user and click “Add User”
When creating a new user after the departments have been set up, they can be easily added into the departments whilst configuring the rest of the user settings.
Routing Groups are used to direct chats to the relevant operators, you can group users by:
-
Skill & Knowledge, for example Sales, Support, Finance
-
Hierarchical Status, CSRs / Supervisors / Managers etc.
To set these up, navigate to “Chat” under “Configuration” click “Chat Routing”.
Chat Routing is configured in a similar manner to Departments. Name the new routing group and click “Add New”, once added select the routing group in the list; choose the user and “Add User”.
New users can simply be added into existing routing groups within the “Users” tabs.
Now that your users are fully set up, they can begin to explore the Click4Assistance live chat software; there are multiple supporting documents for customer service representatives on best practices and handling the chats, and for administrators and your IT team on how to configure the rest of the account.
For more information give our account managers a call on 0845 123 5871 or email theteam@click4assistance.co.uk.