


Customise your chat window for Halloween
Tags
Categories


We show you how to customise your chat window for Halloween using Click4Assistance Experiences to wow your customers.
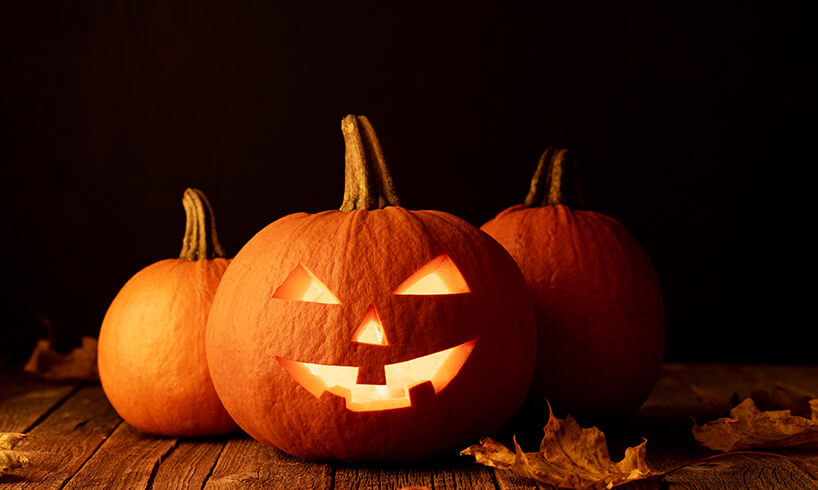
Updating your website to match certain themes or events is a great way to captivate your audience and add a touch of fun to proceedings. With Halloween not too far away, you may be thinking about making a few customisations to your site, opting for a spooky theme.
All elements of your site need to match this theme - including your chat window. Normally, when you add a chatbot to your website, it can stick out like a sore thumb. The design is different and it doesn't change - even when the rest of your site follows a seasonal theme.
At Click4Assistance, our chatbot for websites is different. We've introduced something called Experiences that lets you customise every element of the chat window. Today, we'll show you exactly how this works so you can give live chat a Halloween makeover!
What are Experiences?
A Click4Assistance Experience simply refers to how your website chat facility is configured. You can decide the experience a customer goes through when they interact with the widget. This includes the way the initial buttons look, the forms they see and so on.
These Experiences are fully customisable without the need for any coding knowledge or web development skills. This lets you alter everything from the style of the forms to the colours used in the message bubbles. With that in mind, here's how you can customise your Experience to give it more of a Halloween theme:
Step 1: Log into your Click4Assistance account
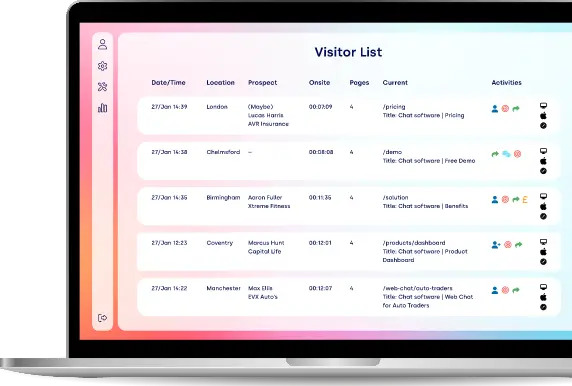
To start customising things, you need to log into your Click4Assistance account. On your dashboard, you should click on Tools > Chat. This will bring up the chat experience you're using on your website, displaying it as a flow chart.
If you don't have a Click4Assistance account, then click here to get a Free Trial of our software.
Step 2: Customise the buttons with a Halloween theme design
In the flow chart you will see options for online and offline buttons. If you click on either of these, it will open a customisation menu. From here, you're able to alter the appearance of the buttons using different pre-set templates provided by our team.
Or, you have full control over the design, meaning you can upload your own custom buttons. Using a tool like Photoshop, you're able to create a Halloween-themed button design to place on your site. It can include any Halloween theme you like - from pumpkins to ghosts, and so on. When you've created your design, upload it and select it from the list.
You can do the same for the mobile version of these buttons too, which tend to be a bit smaller. One cool idea is to upload your own custom image of a chat button that looks like a pumpkin. Upload this via your dashboard and you've got a quirky Halloween addition to the site.

Step 3: Customise the chat window style
After finishing the button customisation, click on the Style section displayed in your chat experience. This will open a new window with a variety of stock templates displaying different style settings. There are also two customisation options:
- Simple
- Advanced
We'll only talk about simple customisation here as the advanced one is more technical and does require some coding. Click on the Simple button and you open up another window that lets you configure all elements of the chat window. This includes the following:
- Your logo
- Frame colour
- Form colour
- Button colour
- Header text colour
- Title colour
- Button text colour
- Border colour
- Text colour
- Icons colour
For a Halloween theme, you should alter these colours to create a spooky colour scheme. Instead of using your normal branding, opt for things like orange and black as a colour pair. It's instantly synonymous with Halloween, so visitors will immediately get the connection and think it's pretty neat that you've gone the extra mile. Other colour combinations include different purples, greens, and so on.
If you're looking for inspiration, there's a good post that shows you some of the best Halloween colour palettes to try for designs. Simply choose the colours you like and select them in the customisation menu. Play around with different combos and see what looks best.
Don't forget to do this for both the Pre-Chat window and the Dialogue window. It'll ensure the design is consistent and you don't switch from a Halloween chatbot to a standard one in just a click.
Of course, you have the option to upload a logo too. Come up with a custom Halloween logo design and it will be displayed in the chat window for all to see. Then, save your new style and it will be selected automatically.
Step 4: Preview your new Halloween theme
After making the changes to your chat experience, load up your site to see how it looks. Things may look great when you're making them, but how do they align with the rest of your site? This gives you a great way to see if everything works well together or if you need to make a few tweaks.
When you're happy with the design, you can publish it and visitors will now see your new Halloween chat window.
Key things to keep in mind
Before we end this guide, there are some key things to keep in mind.
Firstly, your button configuration is separate from your chat window configuration. When you change the colour of the window, the buttons won't match it. So, make sure you're using the exact same colours for your buttons and windows to avoid any clashes.
Secondly, don't forget to change your chat experience back after Halloween! It's something you could do in the lead-up to the event - maybe throughout October - but you have to revert it immediately to avoid embarrassment.
The great thing about Click4Assistance Experiences is that your styles are saved after. When next year rolls around, you'll already have the Halloween preset saved, so you can simply click it and everything will be done. If you like the idea of customising your chat windows, think about doing it for other instances - like Christmas, Easter or major sporting events.